Make an Appointment
Splints are devices used to immobilise or support injured bones, joints and soft tissues. Whether you’ve sustained a fracture, tendon injury or a sprain, the right splint can significantly reduce pain, prevent further damage and promote optimal healing. In aged care, splinting also helps older adults maintain function, enabling safe participation in daily activities such as eating, dressing or light household tasks, while protecting delicate tissues from reinjury.
But not all splints are created equal. Materials range from simple foam and Velcro straps to thermoplastic custom-molded shells. Designs vary by intended purpose: short opponens splints for thumb support, wrist cock-up splints to limit flexion, dynamic splints that allow controlled motion. Selecting the correct splint involves understanding the injury’s location and severity, the desired level of immobilisation, and the wearer’s tolerance for bulk, heat and movement restriction.
Before application, a thorough neurovascular assessment, commonly known as the 5 Ps of splinting, ensures safe circulation and nerve function. Once these checks are complete, practitioners follow key application principles and splinting rules to secure the device effectively without compromising comfort or skin integrity.
This guide will walk you through how to choose, apply and monitor the splint that best meets your needs.
What Are the 5 Ps of Splinting?
Prior to and immediately after applying any splint, always perform the 5 Ps neurovascular check . Conduct these checks both before first applying the device and after each re-adjustment to ensure continued safety:
1. Pain
- Assessment: Ask the person to rate pain on a 0–10 scale both at rest and with gentle movement. A sudden spike after splinting suggests excessive pressure, misalignment or compartment syndrome risk.
- Action: If pain increases by more than two points, loosen the splint, reassess alignment, re-pad bony areas and repeat the check.
2. Pallor
- Inspection: Compare skin colour distal to the splint against the contralateral limb under natural light. Pale, ashen or mottled skin indicates compromised arterial flow.
- Action: Remove or loosen the device immediately and elevate the limb; seek urgent medical review if colour does not return.
3. Pulselessness
- Palpation: Locate the distal pulse (e.g., radial artery for wrist splints, dorsalis pedis for ankle splints) and assess quality (strong, weak, thready).
- Action: An absent or markedly weakened pulse requires immediate loosening and possibly repositioning of the splint to relieve vascular compression.
4. Paresthesia
- Sensory Check: Lightly touch the skin distal to the splint in key nerve distribution areas (thumb/web-space for median nerve; little finger side for ulnar nerve). Inquire about “pins and needles,” numbness or tingling.
- Action: If any new or worsening sensations occur, adjust padding and straps to relieve pressure points over nerves.
5. Paralysis
- Motor Test: Ask the person to actively move digits or toes against gravity. Inability to initiate movement suggests severe nerve compromise or excessive immobilisation.
- Action: Loosen straps, ensure splint contour does not impinge on joints, and repeat the assessment. If paralysis persists, seek immediate clinical evaluation.
Completing and documenting these five checks ensures the splint serves its protective purpose without endangering tissue health. Should any “P” be abnormal, always address the issue before leaving the person unsupervised.
What Are Three Important Things to Remember When Applying a Splint?
Successful splint application hinges on three key considerations:
1. Immobilise the Joints Above and Below
A splint must span from one joint above the injury to one joint below. For example, a forearm fracture splint extends from the proximal elbow crease to the metacarpal heads. This prevents unintended movement at adjacent joints, maintaining alignment and reducing pain.
2. Provide Adequate Padding & Avoid Pressure Points
Use 1–2 cm of soft, conforming padding (e.g., stockinette and cotton rolls) over bony prominences (elbow olecranon, ulnar head, radial styloid) before applying the rigid shell. Insufficient padding can lead to skin breakdown, while excessive bulk reduces immobilisation effectiveness.
3. Secure Firmly but Not Too Tightly
Straps or bandages should immobilise without strangling circulation. After fastening, perform the 5 Ps check. If swelling increases, common in acute injuries, reassess tension and consider elevation or a circumferential bandage that can be loosened as needed.
By spanning the correct anatomical length, using thoughtful padding, and balancing security with circulatory safety, you’ll ensure the splint protects rather than harms the injured limb.
More Articles Related to Mobile Physiotherapy


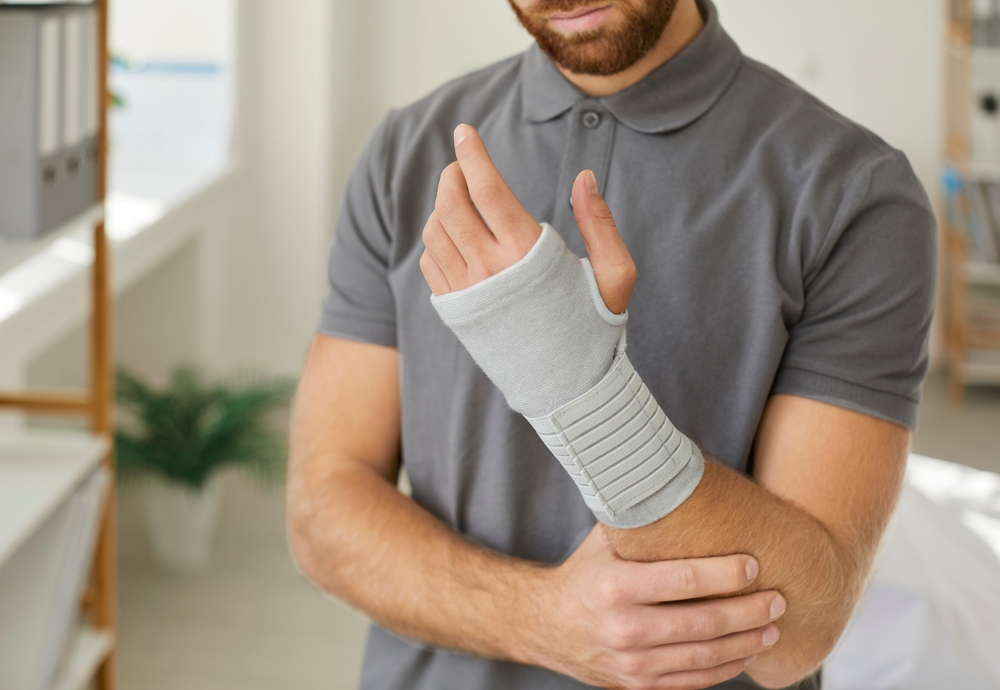
How Do I Choose a Wrist Splint?
Selecting the right wrist splint requires matching design features to your specific needs:
Type of Immobilisation
- Cock-up (Dorsal) Splint: Holds the wrist in slight extension (10–20°), offloading carpal tunnel or tendonitis.
- Volar Splint: Supports from the palm side, useful for fractures of the distal radius without compressing extensor tendons.
- Circumferential Splint: Envelops the entire wrist for maximum rigidity in unstable fractures or post-surgical protection.
Material & Breathability
- Pre-fabricated Neoprene: Offers gentle compression and warmth for mild sprains or arthritis flare-ups.
- Thermoplastic: Custom-moldable for a precise fit, ideal for chronic conditions requiring long-term wear. Provides firm support but can be bulky and warm.
Size, Fit & Adjustability
- Measure wrist circumference at the distal forearm. Splints often come in small/medium/large; choose a snug fit without discomfort.
- Adjustable straps allow tightening or loosening to accommodate swelling or to facilitate hygiene care (handwashing, skin inspection).
Functional Requirements
- Finger Mobility: If you need to type or grip utensils, opt for designs that leave the digits free while stabilising only the wrist.
- Dominant vs Non-Dominant Hand: You may accept slightly more bulk on the non-dominant side to maximise comfort on your dominant hand.
Comfort & Aesthetics
- Look for soft linings, seamless edges and low-profile designs if you’ll wear the splint for extended periods or under clothing.
- Trial-fitting in a clinic environment helps identify any hotspots before committing to a long-term device.
Consulting an Occupational Therapist or Physiotherapist ensures you receive a splint tailored to your anatomy, lifestyle and treatment goals.

What Are the Four Rules of Splinting?
Adhering to these four fundamental rules will optimise splint effectiveness and safety:
Rule 1: Align in a Neutral, Functional Position
Splint the limb in a position that neutralises stress on injured structures, commonly mid-range for joints (wrist at 10° extension, elbow at 30° flexion). This promotes comfort, protects healing tissues and preserves as much function as possible.
Rule 2: Secure Above and Below the Injury
Ensure stability by fixing the splint firmly one joint proximal and one joint distal to the injury. This prevents lever action and unwanted angular forces at the site, maintaining alignment and reducing pain .
Rule 3: Allow for Regular Neurovascular & Skin Checks
Splints must be removable without tools. Educate the wearer (or carer) to loosen straps daily and perform the 5 Ps. Instruct on skin inspection for redness, abrasions or pressure marks at least twice daily, especially during the first 72 hours when swelling peaks.
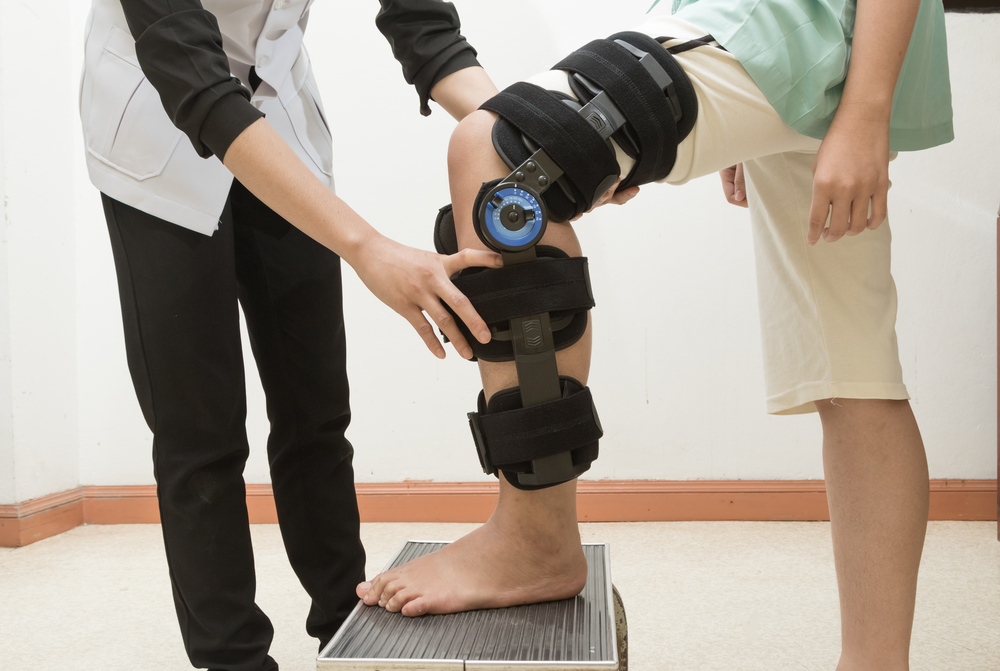
Rule 4: Balance Immobilisation with Function
While full immobilisation is sometimes required (e.g., acute fractures), consider dynamic or hinged splints when early controlled motion benefits tendon gliding and joint nutrition. Adjust rigidity according to healing stage and functional goals.
(Bonus Rule) Ensure Patient Comfort & Compliance
A splint is only effective if worn. Use soft edges, moisture-wicking liners and low-profile fastenings. Reassess fit after the first 24 hours, small adjustments often prevent non-compliance due to discomfort.
By aligning properly, spanning the correct joints, facilitating ongoing monitoring and preserving function, these rules guide safe, effective splinting across a variety of conditions.
Frequently Asked Questions (FAQs)
1. Can I wear my splint while showering?
Generally no. Most splints aren’t waterproof. Use a waterproof cover or remove the splint, ensure the skin is dry, then reapply padding and the splint immediately.
2. How long should I keep my splint on each day?
Follow your therapist’s guidance. Acute injuries often require near-constant wear (23 hours/day) for the first week, tapering as healing progresses.
3. What do I do if my hand or fingers swell inside the splint?
Loosen the straps, elevate the limb above heart level for 10–15 minutes, then re-check the 5 Ps. If swelling persists, consult your therapist to adjust the splint.
4. When can I start gentle exercises?
Only under professional advice. Some splints permit controlled movement, your Occupational Therapist/physio will provide a safe exercise plan to prevent stiffness without risking reinjury.

Choosing and applying the right splint is critical to protecting injured tissues, managing pain and preserving function. By performing the 5 Ps neurovascular checks, following key application principles and abiding by the splinting rules, you ensure optimal healing conditions.
Next Steps:
- Book a Splinting Assessment with Physio Inq’s Occupational Therapists or Physiotherapists: available in-home, in-clinic or online.
- Receive a Custom-Moulded Splint tailored to your anatomy and lifestyle needs.
- Learn Safe Application & Monitoring, including the 5 Ps and skin care protocols.
Call 1300 731 733 or book online to secure expert guidance and get your splint fitted correctly—so you can heal safely and return to the activities you love.

Date Published: Tuesday, May 27, 2025
More Articles Related to Splinting Techniques
Locate a Mobile Physiotherapy
Service Near me
Get the experience & convinence you deserve to support your or a loved one's allied health needs.
Our Mobile Physiotherapy team are currently serving & taking appointments in the following states and regions in Australia:
New South Wales
- Blacktown
- Blue Mountains
- Campbelltown And Macarthur
- Canterbury-Bankstown
- Eastern Suburbs Sydney
- Georges River
- Hawkesbury
- Inner East Sydney
- Inner West Sydney
- Lake Macquarie
- Lower North Shore
- Newcastle
- Northern Beaches
- North Sydney
- Parramatta
- Penrith
- Southern Highlands
- South West Sydney
- Sutherland Shire
- Sydney CBD
- The Hills Shire
- Upper North Shore
- Waverley
- Wollongong
Tasmania
Victoria
Need to get into direct contact with our Client Services team? We're all ears. Call our team directly on 1300 731 733